In this Digital Art session, we are going to learn how to take a portrait image by using our mobile phone for our website. I am using my iPhone 8 and the original camera app of the phone to take a picture. There are some simple setting and filter can be use in the app.
It was sunshine on Friday, and I though it would be great to take a picture under the natural light environment. Therefore, I had asked my flatmate to help me to take a set of photo, and told her about what we had learn before the Digital Art : tapping the face, bring down the exposure, and take more with live photo. However, I was not really satisfied with the result, it was a little exposed with the light, and there were a lot fail photos which I had not ready, it looked a bit back and quot for me. Here are the result :
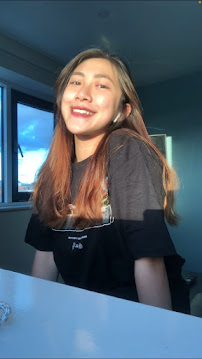
I tried to take another set with myself. I think it would be more controllable and easier to tune the angle that I want. So I just set up a timer for 3 seconds and put the phone on the bar counter which face with the window. Here are the result that I photograph with my self-camera:
I think the second one looks more active and energetic with the smile, it can also clearly to see my whole face, the audience can properly know the characteristics of mine though the the photo. Therefore, I had choose this one for my website personal portrait. And then I transfer the photo to my MacBook, opened the file in the ' Photo ', it can be seen there are a setting list for edit. I had increase the light degree to 10, and shaper the shape about 15 of the photo. I think this was far enough for the effect so I did not edit too much at the end.


Again good that you have completed this now - again if a little late! You have added some technical details and thumbnails so this is good
ReplyDelete